The origami lily is a great model for ambitious beginners. It is certainly not the
easiest, but looks pretty impressive. The diagrams introduce some more complicated folding
techniques that are quite common in many origami models, but they should still be understandable.
The lily also is suited as a nice little gift.
Folding instructions with diagrams below. A brief explanation of frequently occurring symbols can be found on the
home page, section Folding technique and diagrams.
Alternatively, you can also download the PDF version of the folding instructions.
Folding instructions: Diagrams
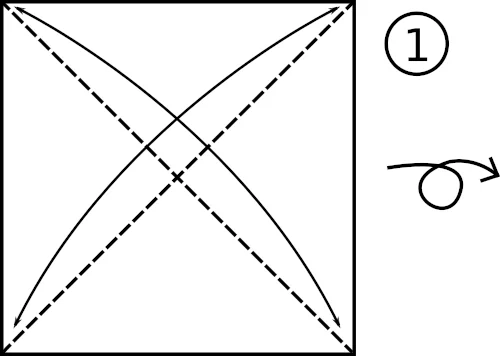
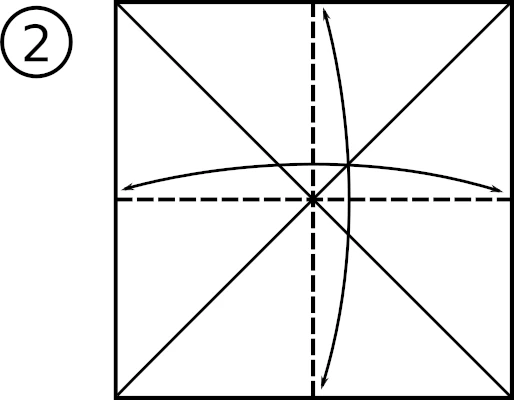
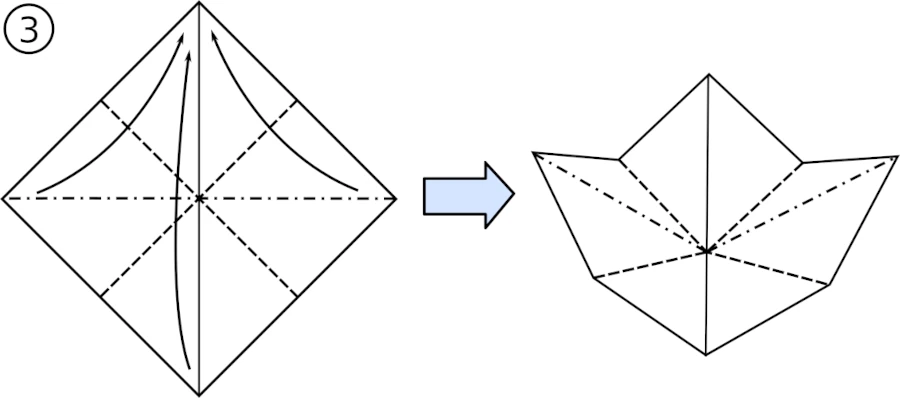
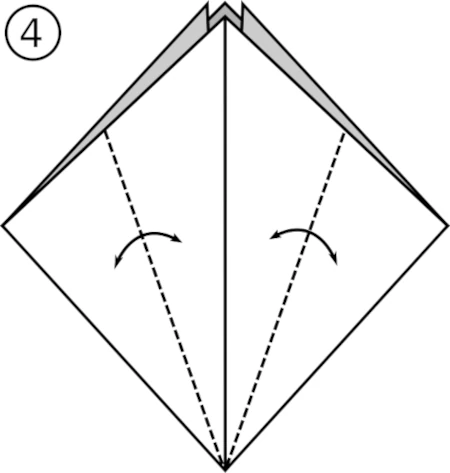
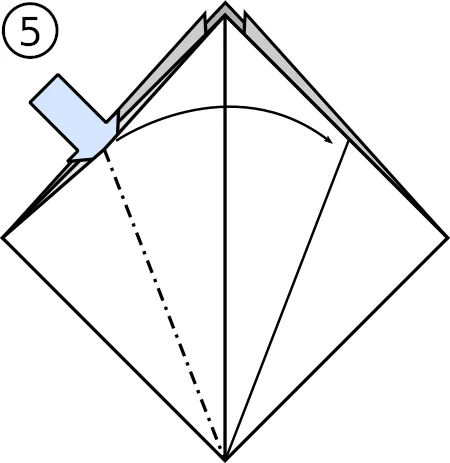
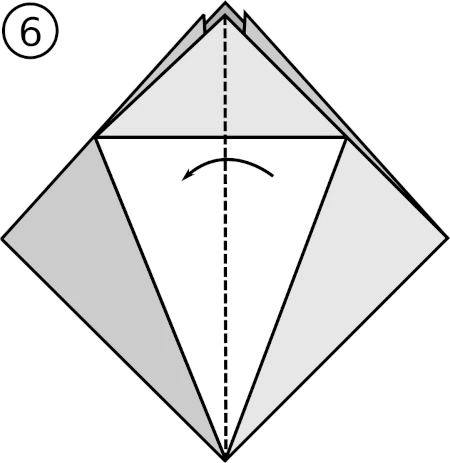
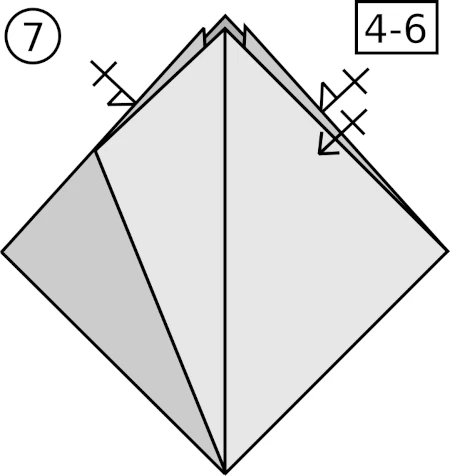
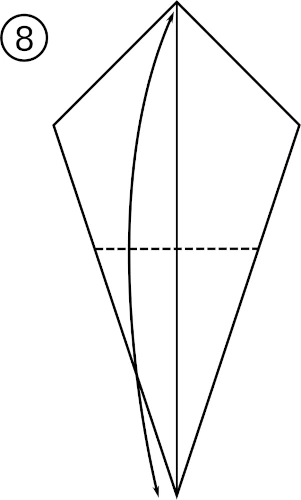
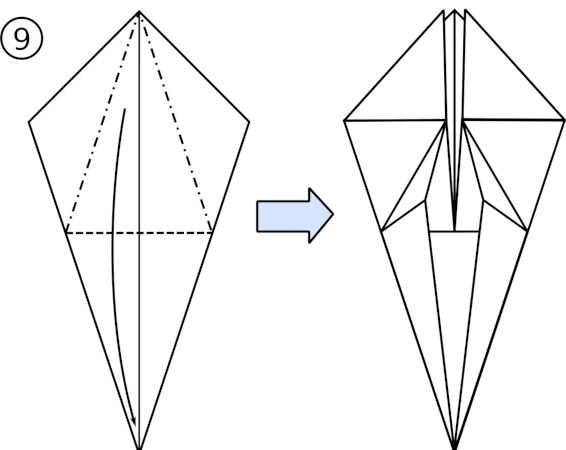
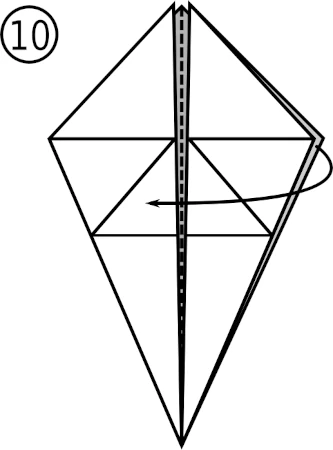
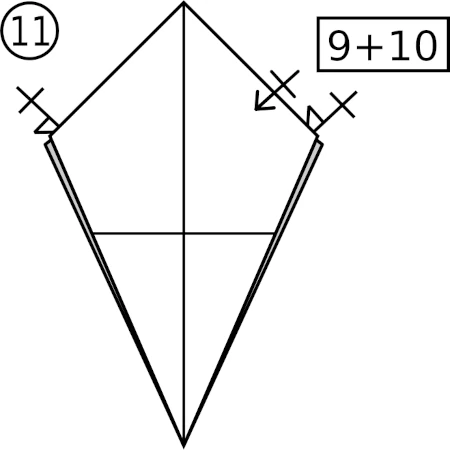
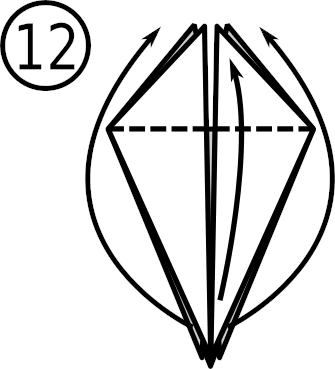
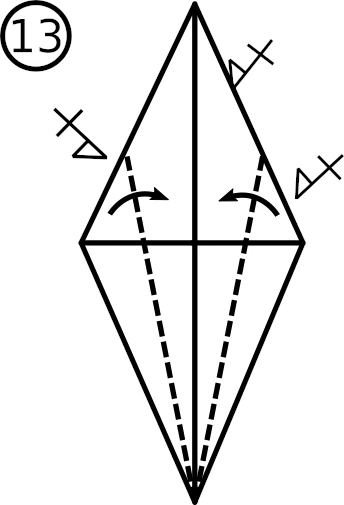
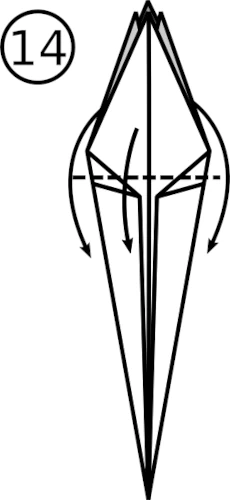
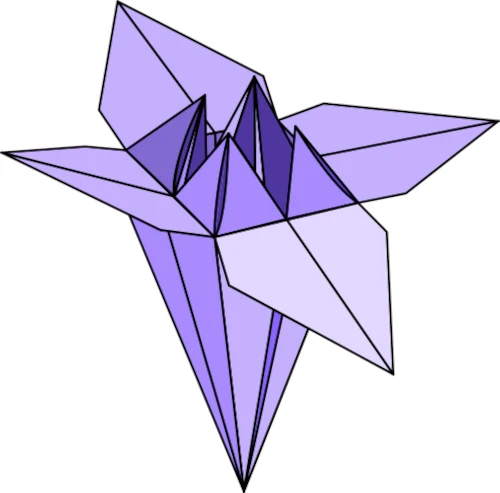
Fold and unfold the paper alongside the diagonals.Flip the paper, then fold the paper in half and unfold.Fold along the dotted lines and direct the corners to the top. The result is shown in step 4.Fold the topmost layer to the middle, as shown in the diagram, then unfold.Open the flap from the inside and squash towards the right.Fold to the left.Repeat steps 5 and 6 on the right. Then, turn the paper around and repeat steps 4 to 6 on the back. The result should look like the figure in step 8.Fold and unfold in the middle horizontally.Open the top flap (only the topmost layer) and direct the tip to the bottom (horizontal valley fold). Flatten along the dotted lines.Fold one layer to the left.Now repeat steps 9 and 10 three times. The result should look like the figure in step 12.Fold all four flaps up along the marked line.Fold towards the center along the dashed lines, then repeat three times (flip side and between the layers).Fold the four flaps down to adjust the petals.The finished lilyYou can bend the petals using a pen to achieve a different look.